
7. Type your personal information into the appropriate fields of the dialog, beginning with your real name.
8. Type in your e-mail address.
9. Select a "nickname" (also called a "nick" in IRC-land; it's the same as what AIM calls a screenname). The nickname you provide should be your regular ENGL 2111/2112 username.
10. Now that you are finished with your personal information, you need to tell mIRC what server you wish to connect to. Click Add to open the server dialog.
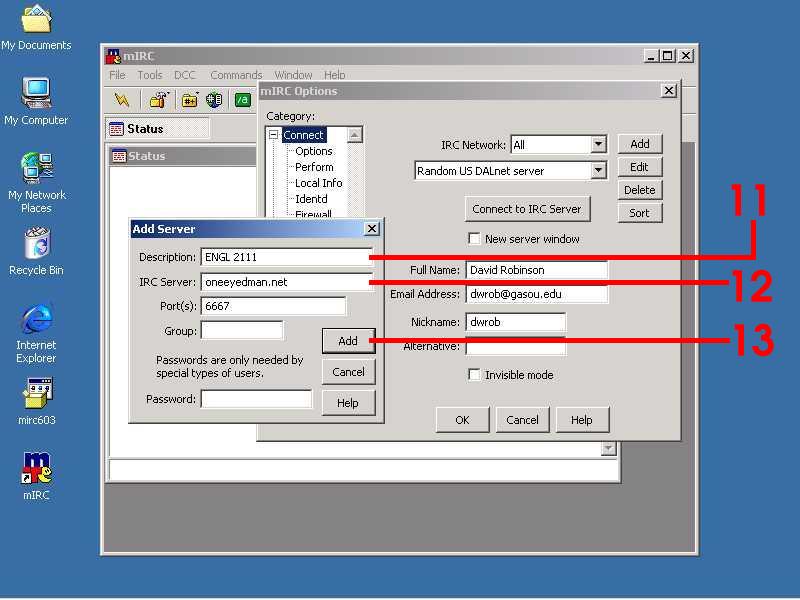
11. Enter a descriptive phrase. (It doesn't matter what it is, though you might want to choose something you can easily identify later on.)
12. Type in the address of my IRC server, oneeyedman.net. Get it right!
13. Commit the server information by clicking Add in the Add Server dialog.
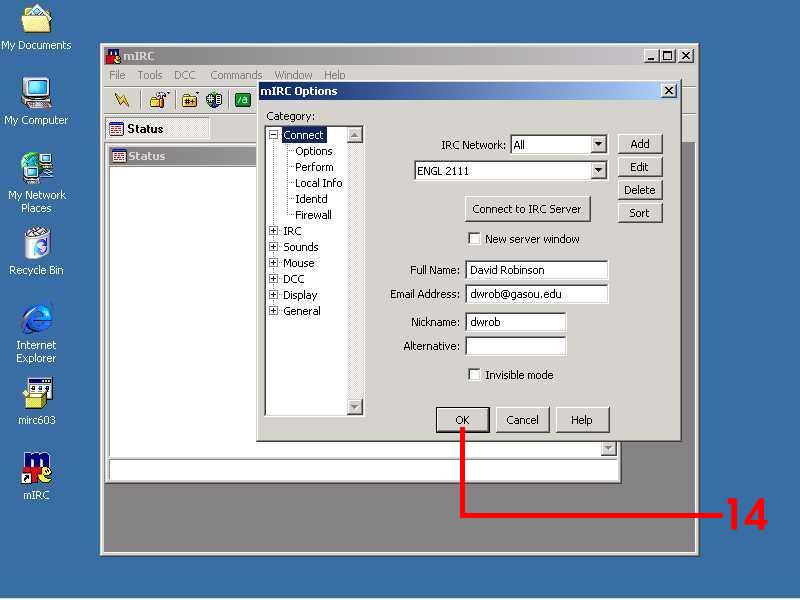
14. Click OK in the mIRC Options dialog.
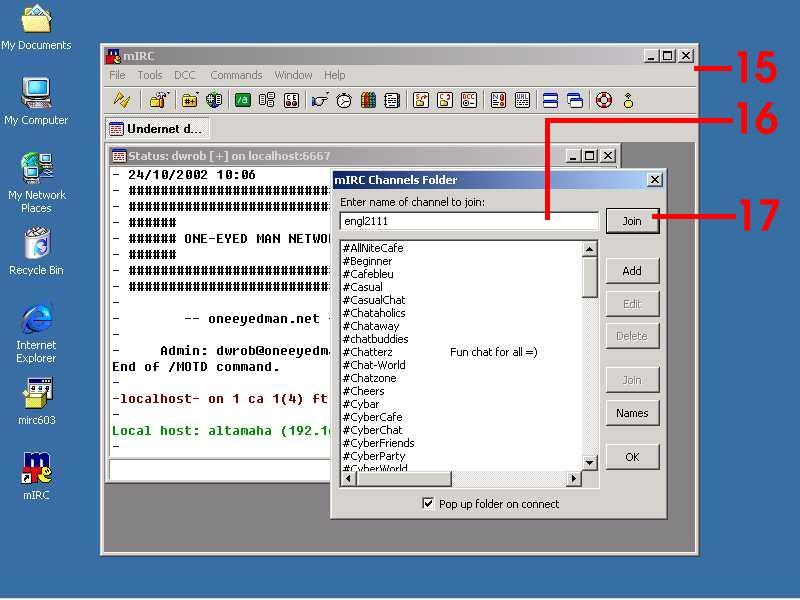
15. The main mIRC window will appear.
16. The mIRC Channels Folder dialog will also pop up. Type the name of our channel into Enter Name of Channel To Join: 2111k or 2111net. Get it right!
17. Click Join to enter the channel.
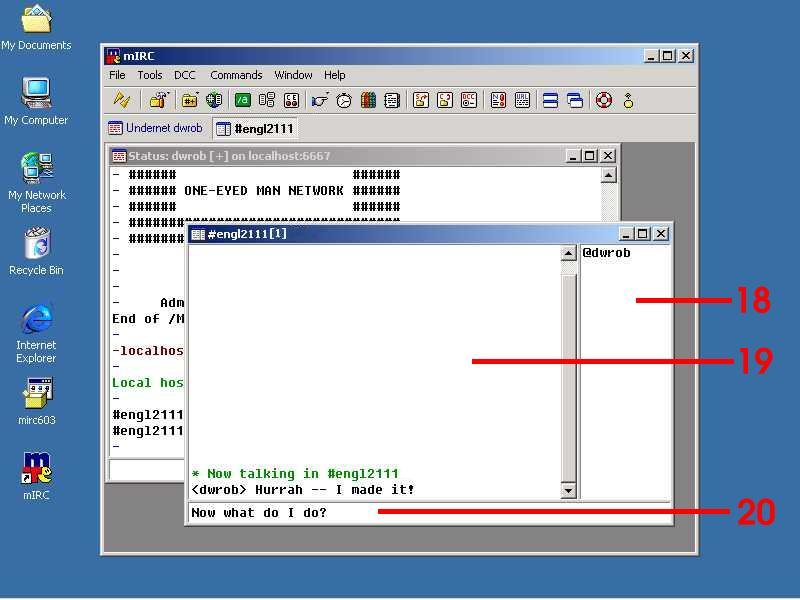
18. You are in! Your nickname should appear in the pane at right. You can also see who else is in the channel.
19. A transcript of the chat scrolls up in the large pane at left.
20. You can participate in the chat by typing in the small textbox at the bottom. Press Enter on your keyboard when you are done, and your words should appear (for all to see) in the large pane.
Installing mIRC - Part I
Installing mIRC - Part II
Created 10-29-02
class@ogeechee.litphil.gasou.edu